Monday, September 26, 2016

Homemade Potato Chips

Anybody else here love potato chips (crisps, for our Brittish readers)? I know I do. However, I'm not exactly fond of paying for a bag of air with a few potato crispies in the bottom. Pringles is at least on the right track -- you haven't seen anybody build a raft out of Pringles cans. I'm not a huge fan of trying to deep fry my own chips, mostly because there's just so much chaos involved... one second too long and you've got construction material rather than snacks, so I originally thought that I was going to be pretty much at the mercy of Frito Lay company, until I came across a company called Mastrad. They're a French cookware company that makes some amazing silicone products, but I won't bore you with a nerd moment about them.

Anyhow, they apparently make this silicone tray-thing that you can make microwave potato chips on. And, oddly enough, they actually turned out pretty well, I will say. You can pick it up at Amazon, but for the love of everything, make sure that you get the one with the mandolin. I've seen a lot of people get the one without the mandolin and then complain that they can't cut the potatoes thin enough. No surprise there -- the ones without the mandolin are meant to be used as expansion trays, since you can use up to three of them in the microwave at once. 

No oil needed, so no added fats. Awesome, eh? I'll admit, the first thing I did after my chip maker kit arrived was headed to my local grocery store and grabbed an assortment of popcorn seasonings, because who doesn't want options? All told, a 10lb bag of potatos and about 10 different seasonings was about the same cost as 5 bags of pre-made chips, which, as we all know, equates to one fully-filled bag of chips. 

In all honesty, as long as you have the potatoes pre-cut, you can actually make this into a bit of an interactive after school snack, which works especially well if your child brought friends with them. My personal advice, though, is to repackage the seasonings into smaller containers if you're going to let smaller children use them. Moderation isn't exactly something to be comprehended by young minds. Small cheap salt & pepper shakers work well. 

Also, if you can somehow get away with storing a bag of potatoes in your dorm room, you can make some really fast, really cheap munchables. Potatoes are so versatile, even if you're only running on the bare minimums of cooking materials. Baked potatoes are (nearly) just as good done in the microwave.

Anyhow... enough yapping. I promised chips, and I'm delaying them. Last time I checked, that was a good way to lose an arm. 


Ingredients:
  • Potatoes, Peeled
    • I used Idaho potatoes, but you can use whatever. I've not tried it myself just yet, but rumor has it that sweet potatoes also work out well
  • Choice of Seasoning / Spices
    • I was a total bum and went straight for the pre-mixed Kernel Seasons popcorn flavoring, but you can do whatever. Or even just a pinch of salt.
Equipment:
  • Mandolin Slicer
    • Just use the one included with the chip kit. It's calibrated to produce the exact thickness of slices that you'll need for this.
  • Mastrad Top Chips Chip Maker
  • Microwave
    • With a turn table, and make sure that the chip disk can fit in it easily, without brushing the sides.

Okay, so you can technically make these with the peel on, and that's supposedly where all the nutrients are at, but I don't do potato peels. So, I peeled them.

The first thing that you'll want to do is slice up the potatoes with the mandolin. Be careful here... I've seen a lot of people hurt themselves on a mandolin slicer, but for the most part, as long as you're paying attention and are appropriately cautious, you'll be fine. You'll want to get the potato slices into water immediately, to prevent discoloring. That weird pink-brown potatoes get when they start oxidizing is not appealing at all.
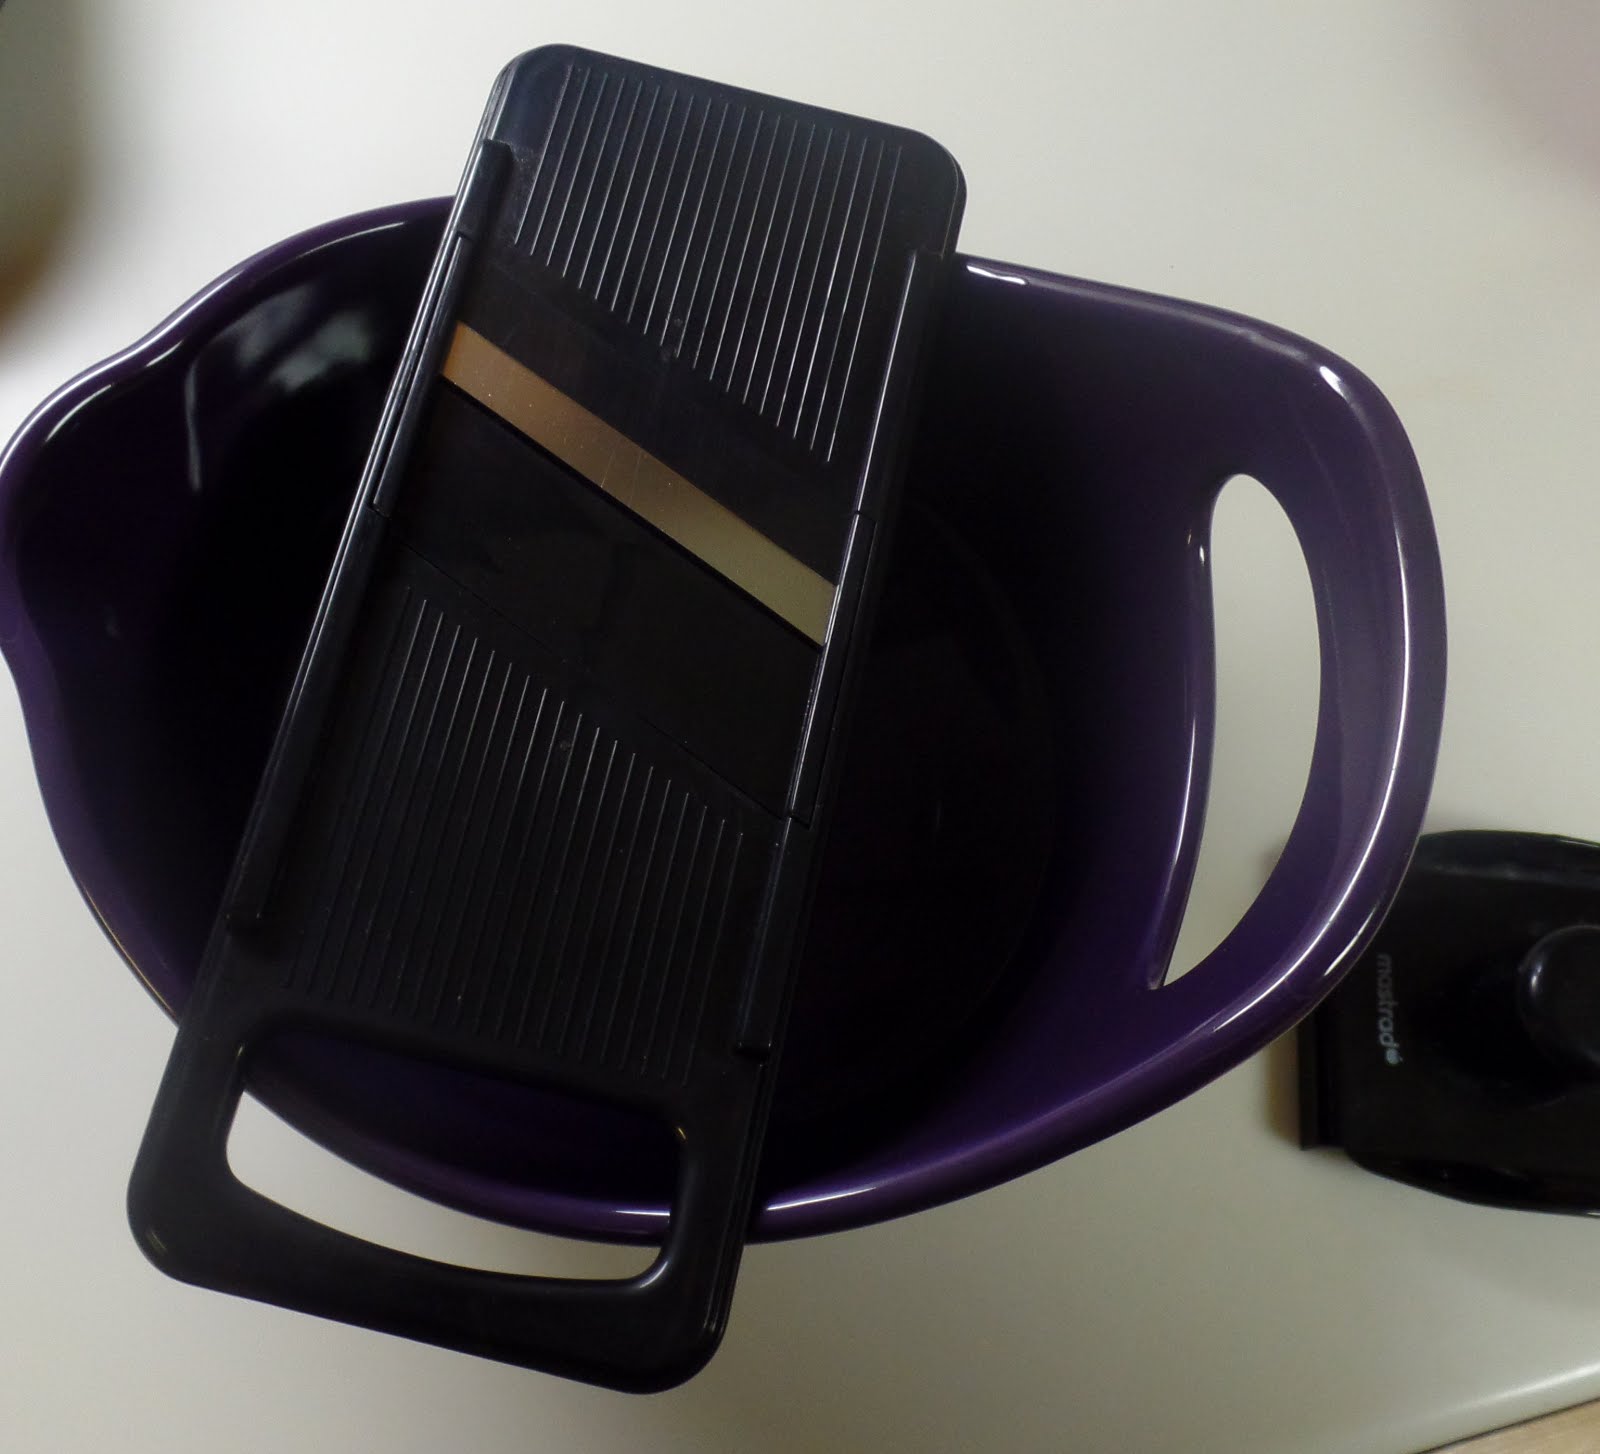

I usually just put the mandolin over the bowl of water to expedite the process.

I suggest only cutting up one potato or two at most at a time, because they go really far. One potato was more than enough to quell the ravenous snack monster living in my stomach.

From here, the cooking actually gets pretty passive. Simply line up a layer of chips on the disk, and microwave until crispy. For me, this meant 3 minutes, taking the disk out, turning all the pieces over (handle with care, the disk may be hot) and microwaving for another minute and a half. Note that not all microwaves are created equal, and I have a bit of a beastly one. After the initial three minutes and flip, cook in small intervals until you get the timing right for your unit. You can always cook the chips longer... you can't uncook them.


If you bought more than one disk, you can load up the second one while the first one is cooking. If not, well, sit tight and wait for the first one to come back out. Once your chips are crispy enough for your liking, season with whatever you want. You may possibly want to mist them with some sort of liquid (such as a light olive oil) to get the seasoning to stick, but I was perfectly fine with just putting them in a small bowl and using the chips to scoop up whatever seasoning fell off of them.

How did yours turn out? What kind of potatoes did you use? Let us know in the comments! Also, be sure to like us on Facebook and follow us on Twitter to stay up to date on all the newest recipes.

Friday, September 16, 2016

Joining Forces

Diabetes. It sucks. I have nowhere near as much right to say that as the people afflicted by the disease, but still. Even just the thought of that is about enough to make me keel over. But you know what? Sometimes life isn't about things being perfect. Sometimes it's just about being able to make things suck less. That's the driving force behind The Type 1 Diabetic Cook blog, operated by a dear friend of mine. So today we here at Epic Feasts are proud to announce that we've partnered with the author of said blog, Samantha Evans, to provide diabetic-friendly alternative ingredient lists and associated information on applicable recipes.

Sometimes conversions can take a while to figure out so if you don't see a secondary ingredient list when a recipe is launched, don't worry. We'll issue notifications when a recipe has been updated to reflect the additional list.

Be sure to like us on Facebook and follow us on Twitter to make sure you don't miss anything!

Saturday, September 10, 2016

Guilt-Free Pumpkin Pie Pops

Our last post in our themed series was a dorm food recipe, so this time we're aiming for something that will pass for an after school snack, for those in the audience contending with the younger stomachs. As a number of various places have pointed out, it's remarkably hard nowadays to find a  suitable "snack" for children that isn't loaded to the brim with sugar, high-fructose corn syrup, food coloring, or other miscellaneous bits that we're told are bad for us. Me? Well, I'm on the train of "if it doesn't taste good, I'm not eating it." Turns out it took a bit of work to find something that would satisfy both of those points and still qualify as something snackable.

After much research, it turns out that pumpkins are roughly equivalent nutrition-wise to carrots. Don't get me wrong, I'm glad to have discovered this, but you're telling me that I spent my entire childhood with people attempting to feed me carrots, which I still can't stand to this day, when they could have just as easily handed me something pumpkin based and I'd be begging for more? Everyone out there with a picky eater, be them 2 or 20, take note.

Now, I will admit, pumpkin items do have a bit of a stigma attached to them, mostly on the grounds of being inanely fattening. Turns out you can capture all of the wonderful delightful flavor of pumpkin goodness without having to revert to wearing sweatpants for a week.


Ingredients:


  • 1 Can Pumpkin
    • Check the ingredients to make sure that it's just pumpkin squish. Some times it's hard to tell the difference otherwise between pumpkin squish and canned pie filling.
  • 4c Low Fat Vanilla Yogurt
    • I used the store-branded regular stuff, but I'm pretty sure that you could use Greek yogurt instead
  • 3tbsp Cinnamon
    • This is really a to-taste thing. I was using cheap cinnamon that was probably a little bit older than it should have been, so adjust accordingly.

Equipment:
  • Popsicle-Making Equipment
    • I wound up using the Zoku Classic Pop Maker that I found at Michaels over the summer, but the old plastic-cups-and-popsicle-sticks route works just as well.
  • Freezer
  • Blender
  • Rubber Spatula

The actual active part of this recipe is remarkably easy. The waiting for the popsicles to actually harden up... well... that's the more difficult part. Put all of the ingredients into the blender, and blend until well mixed. I would say until smooth, but everything going in to this is smooth to begin with. You'll likely have to stop every so often and scrape the sides of the blender, because pumpkin kind of likes to stick. 

Thanks Mom for the powerful blender!


In all honesty, you can totally stop at this point and just eat the yogurt blend, with or without some granola. It's rich enough to satisfy the "it's been a long day, I need junk food and Netflix" urge, just for the record. But if you've got the patience to let it freeze, just distribute the yogurt blend into whatever you're freezing it it, pop it into the ice box, and wait.


Popsicle making has come a long way since the early 90s


How did yours turn out? Be sure to let me know in the comments! For all the latest recipes and updates, be sure to like us on Facebook and follow us on Twitter.


Saturday, August 20, 2016

Dorm Food, Epic Edition: Easy Thai Peanut Noodles

Good afternoon, my wonderful internet friends. I'm finally back. As I stated several blog posts back, I *do* have a day job (as much as I'd love to get paid to just cook things and write about it... we can all dream, right?), a life, and general responsibilities that I have to stay on top of. That and, as the many of you that have been doing the whole adulting thing much longer than I have are aware of, sometimes Murphy's Law just drags you to the proverbial vet to get metaphorically neutered. Oddly enough, in my absence, Russia and France were leading my viewership by location stats. I say "oddly" because I didn't really think that I had garnered an international influence just yet. So for everyone that read my work while I was gone (and for those of you that have just been waiting for the next update), rejoice! We're live again!

I'm going to try something a bit different and attempt a series of "themed" posts. Given that it's more or less the start of August, most of you have probably guessed it: I'm going to focus on school-related things! Okay, well, sort of. I'm going splits between food you can get away with at the dorm, and after school snacks for my people out there who either have or care for children. Themed posts usually come with some rules, so here's what I'm rolling with. For dorm food posts, I'm shooting for things that don't really take any special equipment to make, and that utilize foods that are either generally considered college staples (in America at least... context makes everything make sense), or that can be found at the dollar store / for relatively cheap. For the after school snacks, I'm aiming for things that appeal to the collective tiny human palate, are generally easy to eat, and aren't too atrociously unhealthy. So no epic sugar explosions, but I may reserve the right to call for a small bit of chocolate or caramel.

That all having been said, today's post is from the dorm food side of the theme, in honor of my sister, who's heading off to college this year. Congrats, kid! You did it!

Living in a very rural portion of the United States, it's fairly hard to be exposed to any form of international cuisine, discounting the cheap most-assuredly-NOT-authentic Asian Buffets that crop up pretty much everywhere. But, many years back, my mom hit some sort of, I don't know, massive food clearance sale at somewhere that carried all kinds of wonderful foreign ingredients, and brought me back several bags worth of goodies. Among the plethora of delightfulness, I found what I eventually figured out was a cup-noodle variant of Thai Peanut Noodles. Now, I realize that this is probably a far stretch from the real stuff, but I wasn't going to complain. I was just thankful it wasn't fried chicken. Long story short, it was **amazing**.

There was only one problem with this, though. After having ran out of the stock pile that my mother got on the cheap. I went to the grocery store and found out that getting more of them was going to be insanely expensive. Ugh. Turns out it's not that hard to make, though. Full disclosure: the recipe you'll find below is based off of some research that ultimately landed me on All Recipes.


Ingredients: 


  • 1/2c Creamy Peanut Butter
  • 1 can Coconut Milk
    • If you can catch them on a good day, Dollar Tree actually carries this in their food section
  • 3tbsp Lime Juice
  • 2tbsp Soy Sauce
  • 2tbsp Hot Sauce
    • I somewhat cheated here. I used sriracha (rooster) sauce. I didn't bother to check if it actually was available within the price range, but you can use whatever hot sauce you want, and I've seen plenty of hot sauces on the shelf in the dollar section. Although, seriously, every parent that's reading this for their kid in college, send them a bottle of sriracha. It lasts forever and is super versatile. It's honestly about the only reason I didn't go insane at college, because it gave me the capacity to break up the monotony.
  • 1tsp Garlic Powder
    • NOT garlic salt
  • 1/2 tsp Ground Ginger
  • 2 pkgs Ramen Noodles, Minus Flavor Packets
  • Water
Equipment: 
  • Stove or Hot Plate
  • Pot
  • Sauce Pan / Skillet
  • Stir Spoon
  • Heat-Resistant Whisk
  • Strainer


Good news! This recipe is fairly easy and will actually serve two people, perfect for splitting with a roommate or a significant other. If you only want one serving... well, if you've made it to college, it's pretty widely assumed that you can accurately do simple division.

You're going to need to break out your multi-tasking skills for this recipe. In the pot, put some water on to boil. In the sauce pan, put all of the coconut milk and the peanut butter. You're going to want to put this on the lowest setting your burner has. You're basically just trying to barely warm it up enough for the peanut butter to get a little less thick. This stuff can and will burn very easily, so unless you are trying to sacrifice your dinner, assume I'm dead serious about the lowest heat setting thing.

Trust me, it'll look better here shortly. 


Once the water in the pot is boiling, put in the blocks of ramen noodles. Meanwhile, you're going to want to be gently but thoroughly stirring the peanut butter until it essentially melts into the coconut milk. It starts out looking kind of... weird, but it'll get ironed out eventually. Actually, I stand corrected. If you're ironing the sauce, you're doing something wrong. From there, fully mix in all of the other liquid ingredients, and season to taste with the herbs.

A little patience goes a long way.


Once your noodles are done cooking, strain them and transfer to a bowl. From here, you can add as much sauce as you want. I'm really more of the kind that prefers a whole bowl of sauce with a few rogue noodles in it, but I'm weird like that. All that's left to do now is to let it cool.

How well did yours turn out? Let me know in the comments!

*   *   *

To make sure you never miss a single delicious and delightful thing we come up with here at Epic Feasts, be sure to like our Facebook page and follow us on Twitter.

Monday, July 4, 2016

Firework Tower: A Sweet Addition To Your Independence Day Celebrations

Happy Independence Day, everyone! Hopefully you're all being safe out there. Do me a favor, though. Every time that you thank a military service person today for keeping the freedom, be sure to thank an emergency services responder for always being there to clean up after the people that celebrate a little too hard, eh? The freedom to carry on about our usual lives has as much to do with the people who contend with civilian issues as it does with the people who face the battlefront. If you're reading this and you've served our country in any capacity, military or otherwise, I salute you.

Now, today we've got a real treat on our hands. This is courtesy of two people... Danish food blogger Mat over at Kvalifood for giving me the inspiration, and my old roommate Shirley for giving me the necessary equipment.


I call it the Firework Tower, as I feel that it accurately captures all of the fun and festivities of watching fireworks. However, this is technically a take on a Danish dessert (not to be confused with a Danish pastry, although you know you're doing something right when your country has an entire food named after it) called "kransekake." There's about as many spellings of that word are there are letters in it, so I'm going with the one listed on the product name for the specialty pans needed to make this. Traditionally, kransekake is made with marzipan-type-stuff, but this one is made with cookies, as almond paste is expensive. And that's putting it lightly.


Equipment:

  • 1 Set Kransekake Pans
  • Mixer
  • Piping Bags & Tips
    • I used a smaller star tip for this... but feel free to use whatever. As long as you've got the GOOD plastic baggies and not the cheap ones, you can usually get away with one of those instead of a piping bag
  • Cake-a-Whirl
    • I broke out my trusty ol' Wilton Trim & Turn
  • 12in Cake Circle
  • Cooling Racks
  • Spray Grease

Ingredients:
  • Cookie Dough, Half Red, Half White
    • I actually used 2 boxes of Betty Crocker candy cane cookie mix, left over from Christmas. It has a slight peppermint flavor, but I found that it works well for this. You'll want the dough to be slightly stiff, though, so I made it with slightly less butter and water than called for.
  • 12oz (Block & 1/2) Cream Cheese, Softened
    • Don't get the reduced fat stuff... it doesn't work quite right
  • 1/2c Butter Or Substitute, Softened
    • As usual, I used my cheap old store brand vegetable oil spread. What? Real butter is EXPENSIVE.
  • Blue Food Coloring
  • Lots of Powdered Sugar
  • 1tbsp Vanilla Extract
    • I used imitation extract... you may need less if you're using the real stuff. Taste testing is a thing here... be sure to use it.
  • Flour

The first thing that you'll want to do is preheat your oven to 350F, and spray down the insides of the kransekake ring molds with grease. Grease is your friend here. While that's warming up, start rolling out the dough into snakes, trying to get each one about half the width of one of the kransekake rings. Twist the two colors against each other into a rope, and load it into the ring molds, starting with the inner rings. Work in parts about 1/3 the length of the ring, and follow it around, gently squishing the ends together.


You'll want to squish the dough down so that the top of it is pretty much even with the "high part" on the ring mold, as cookie dough likes to spread out when cooked, and you don't want your rings fusing. You can usually work the "extra" dough further down the ring, filling in any cracks. Repeat for all rings.

You'll want the cookies to be fairly stiff by the time that they come out of the oven, so no soft-baked ones here. For me, that was about 15 minutes on convection bake. Times may vary. While the cookies are baking, you can start in on the icing.

Much like the cookies, you'll want a fairly stiff icing, as this is what holds the whole operation together. Mix the butter, cream cheese, and vanilla together until well blended, then slowly add the powdered sugar, mixing on medium. Alternate adding food coloring and powdered sugar, until desired consistency and color are achieved. Now, the type of butter that you're using and the ambient humidity can greatly affect the amount of powdered sugar that you have to use in order to get a stiff icing. You'll want it soft enough to put through a piping bag without bursting said bag, but hard enough that it doesn't run when at an angle. This took me about 6 cups of powdered sugar, but it had also been raining all day.


Once the cookie rings are done, take them out of the oven and let them cool completely, in a dry location. The cooling is important, as it allows them to finish stiffening up. Once they're cooled, free the rings from the molds. I found this was fairly easy to do by running a fingernail round the entire outside of the outermost cookie ring, removing that ring, and then repeating for inner rings. DO NOT mix up the order of the rings. Seriously. Don't.


Find the largest outermost cookie ring and adhere it, as centered as possible, to the cake circle with the icing. Then, go with a zig zag pattern around the ring, making sure that the icing comes down over the edge of the ring.


Find the next ring in the size series and gently press it into the icing on the just-decorated ring. For what it's worth, the ring molds are made to where the size progression involves the outermost ring from each set, then, starting back with the original mold, the middle ring, etc.

From there, it's pretty much repeat, repeat, repeat (but no lathering or rinsing, please) until all the rings are finished. In the event that you're wondering which ring really comes next, "float" it above the assembled bits in order to find out... don't let it touch the frosting until you're sure. Otherwise you're looking at a mess.


For what it's worth, this piece makes an amazing center piece. Feel free to decorate it with little flags or whatnot. Also -- it's worth noting that there are tons of other countries out there whose colors of representation are red, white, and blue, so, my international readers, feel free to commandeer this as needed for your own respective patriotic celebrations.

Saturday, July 2, 2016

Cocoa Crumpets: An Edible Celebration

As many of you are likely unaware, today marks the 30th anniversary of my singular most favorite movie of all time -- The Great Mouse Detective. A remnant of the days when the villains of children's movies could actually have a personality and character rather than being generic egotistical cocky bad guy #7, the film was actually one of the first Disney movie to use any substantial computer animation, ultimately laying the groundwork for the visuals in some of their more well known movies, notably Beauty and the Beast. 

While it saddens me that The Great Mouse Detective has ultimately fallen out of the light of widely known Disney animated features, I must celebrate the day that this wonderful piece of work was released to the public (and hope that it's included in the Disney-to-Netflix migration coming later this year). As such, I've made crumpets, or a take on them at least.


Not being of anything vaguely resembling British descent, I had to consult the internet on where to start with this particular escapade. Ultimately, I wound up drawing on Bread A Day's crumpet recipe as my initial springboard, and kind of went a bit... astray from there (I really need to check this out more... it's an entire site devoted to BREAD. That's like... 50% of my diet). My version is made to be more of a sweet crumpet, rather than an English muffin impersonator. 

Ingredients:

  • 3c White Cake Mix, Plus Extra
  • 2 Eggs
  • 2c Whole Milk, Plus Extra
  • 4tsp Baking Cocoa
  • 1pkg Dry Yeast
  • 2tbsp Butter Or Substitute, Melted
Equipment:
  • Mixing Bowl
  • Whisk
  • Griddle Or Frying Pan
  • Spatula
  • Plastic Wrap
  • Sifter or Fine Sieve 

Be ye forewarned: there's a lot of wait time involved in making these. Not like active prep time where you're having to do things, but more to the effect of "you won't be able to eat these shortly after breaking out the ingredients." So if you're hangry and in need of an edible sacrifice immediately if not sooner... check out my Oreo Mousse instead. 

The first bit that you'll want to do is whisk together the eggs, milk, and butter, until they're well blended. Once that's all together, you'll want to mix in enough cake mix to get a batter like you're making pancakes. This may take a bit more or less, especially if the humidity level in your area is tripping out. If you over do it, no biggie, just add more milk. Fully whisk in the cocoa and yeast. 

Now comes the tough part. You'll want to cover the batter with plastic wrap and leave it somewhere vaugely warm-ish to rise until it's all bubbly. Mine took over two hours for that to happen, but I also made the mistake of leaving it in an area where my husband controls the air conditioning. I'm pretty sure I saw a Yeti go skirting about the room. 


For now, we shall part ways. But 'tis not forever. 

Once you've actually survived the wait, heat up your griddle or frying pan, and grease it lightly with... well, whatever your preferred pan-greasing-method is. Getting the temperature right on these will take some work, so you'll want to start with only pouring out one of these at a time until you get the temperature set right. This is the point of the show where some people break out egg rings or English muffin forms... I just kind of free handed it due to the lack thereof. It's really kind of like making pancakes. 


Turns out about a quarter cup of the batter is enough to get a crumpet that's sufficiently large, yet still easy to turn over. It stays one way up until there are lots of bubbles (apparently the main distinguishing factor between crumpets and English muffins is the bubbles) and the top is "dry", then you flip it over and finish cooking it. 

I discovered two things while cooking these. One is that my griddle doesn't cook evenly. Sadness. Secondly is that these are amazing with Papa Murphy's cream cheese dip that comes with their cinnamon wheels. One of these days, I'm just going to have to go in there and ask for a gallon of the stuff. Caramel sauce or butterscotch ice cream topping also works really well. 

Sunday, June 26, 2016

Fruit Gusher Cupcakes: An Experiment of Sufficient Deliciousness

Hello everyone! I know it's been a while since you all have heard from me, and I apologize. Turns out that when you've got holes in the roof of the place where you usually cook... it causes some problems.  Especially when it's rainy season. Yeah. If anyone knows where to go to protest to get Murphy's Law repealed, let me know.

That aside, I've got a new recipe for everyone today that's actually my husband's idea. I was kind of surprised when he brought this idea to me. Don't get me wrong -- he's a great cook, he's just usually not into sweet things, which is what caught me as odd about his suggestion. But, whatever. I present: Fruit Gusher Cupcakes! (As I typed that, there were fireworks going off outside. Heh. Makes me feel like I did something important.)


Now, I'll admit, I'm no professional chef or anything. As stated, I have a *very* different day job. I'm just the kid that figured out through trial and (more than I'll ever admit) error, how to feed herself through means other than the takeout window. Although I'm guilty of using that option more than I should. That having been said, these are very much an experiment. We kind of just... rolled with it, really, and went on a grand scavenger hunt through the house for ingredients. Over all, things turned out fairly well. My only real complaint was that it was storming at the time I was doing the frosting, so the humidity and the decoration didn't dance to the same tune.

Spoiler Alert: the Fruit Gusher doesn't melt. I was kind of surprised by this, as I've seen what happens to these if you accidentally leave them in your car. Yes, I am an adult. Yes, I am eating Fruit Gushers. I am old enough to make my own decisions and buy my own groceries.

Anyhow, here's what you'll need for to set up your own laboratory:

Equipment:

  • Mixer and Bowl
  • Mini Muffin Pan
  • Mini Muffin Liners
  • Mini Muffin Holder (Optional)
    • I used the Wilton 3-in-1 caddy. I really like the design as it keeps the cupcakes nice and secure
  • Piping Bag + Tips
  • Spoons
  • Mixing Bowl
  • Whisk
Cupcakes:
  • White Cake Mix
    • I used a Pillsbury Moist Supreme White Cake mix
  • Fruit Gushers


Icing:

  • 4c Powder Sugar, + Additional
  • 1/2c Butter or Similar
    • I used the store-branded "vegetable oil spread". What can I say? Real butter is **expensive**
  • 1tbsp Whole Milk
  • 6tbsp Tang Drink Mix, + Additional

The cupcakes themselves are pretty much straight forward. Follow the directions on the back of the box for making the batter. Yes, I am that much of a bum. What can I say? Fill your muffin pan full of liners, and fill each cavity roughly half way full. Much fuller than that, and they'll overflow when cooking. No dentistry here. Then, push a singular Fruit Gusher into the middle of each batter cup. Okay, I somewhat lied. The dentistry will have to come later. 


I got a hold of a mixed box of Fruit Gusher packs, where apparently half the packages are strawberry, and the other half are some sort of tropical roulette. I wound up drawing out 3 strawberry packages and 1 fruit roulette. The odds were not quite in my favor. Hence why most of them are red. 

You'll want to bake these until they're fully cooked. For me, that was 10 minutes at 350F, in a convection oven. Baking times may vary. Just keep an eye on them. That's the most important part here.

While the cupcakes are roasting, start on making the frosting. Start off with the butter and milk in the bottom of the mixer, and mix in about half the sugar and Tang drink mix. Slowly add in more powdered sugar until the icing is thick enough to use. Humidity can play a huge part in the amount you'll have to use. You'll want for the icing to be fairly thick so that it'll stay together when you put it on the cupcakes and not slide right back off. Unless you want a glaze. Then by all means, go for runny. Your call. 

Making judicious use of ye olde taste test, add in more Tang mix as needed. Just do it in small increments, because you can quickly turn from barely being able to taste it to having your face turned inside out. Anybody remember the face from the warhead candies? Yep. Right there.

Let your cupcakes cool completely, so that they don't melt the frosting, then go to town with all your icing and frosting skills. I used a star tip and just did a generic swirl about the cupcake, but feel free to turn loose with it. Also, general note: I found that they were *much* easier to apply frosting to once they were in my cupcake carrier, because the edges of the mini cupcake tray held them perfectly in place and apart at a decent enough distance. Do yourself a favor and start on the row away from yourself and work across then forwards. Yeah, there's a nice streak of delightfully-flavored frosting running up my arm that says I speak from experience. 

Enjoy!